With the Discovery-Tool you can find the OEE.Boxes in your network. The OEE.Box has a web application where you can make your settings. You can access these using the discovery tool. After starting the tool, you should wait a few seconds until the desired OEE.Box reports automatically. However, make sure that the OEE.Box is in the same network as your PC.
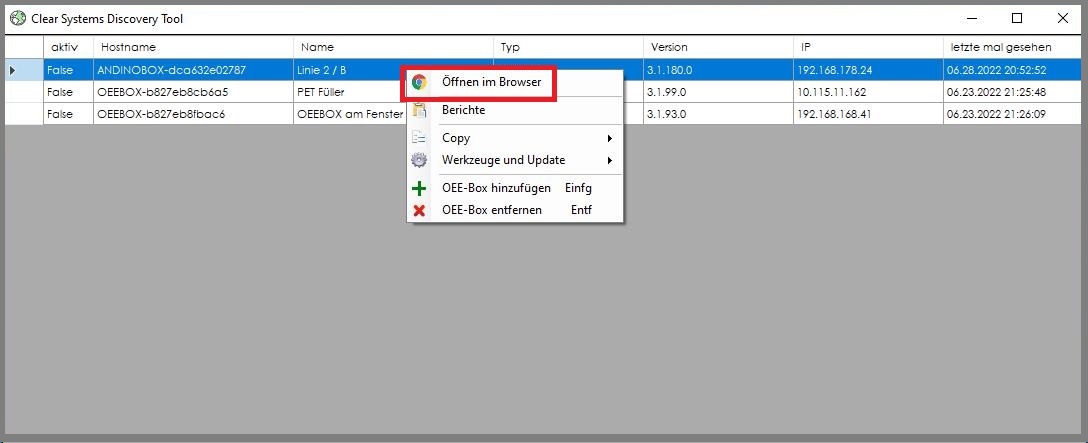
Once you see your OEE.Box active in the Discovery Tool list, right-click on your box's hostname. Various options now open. Click Open in Browser.
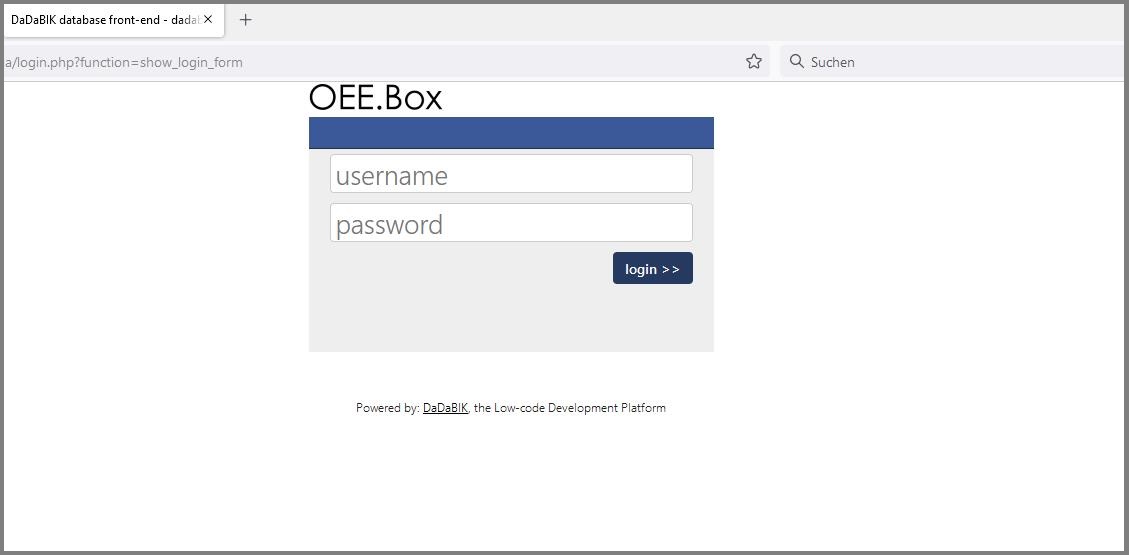
You will then be forwarded to the OEE.Box login page. First, simply log in with the standard login of the OEE.Box. The standard login data are:
username: oee
password: box
User interface
The user interface of the OEE.Box is divided into the following areas:
1.Home
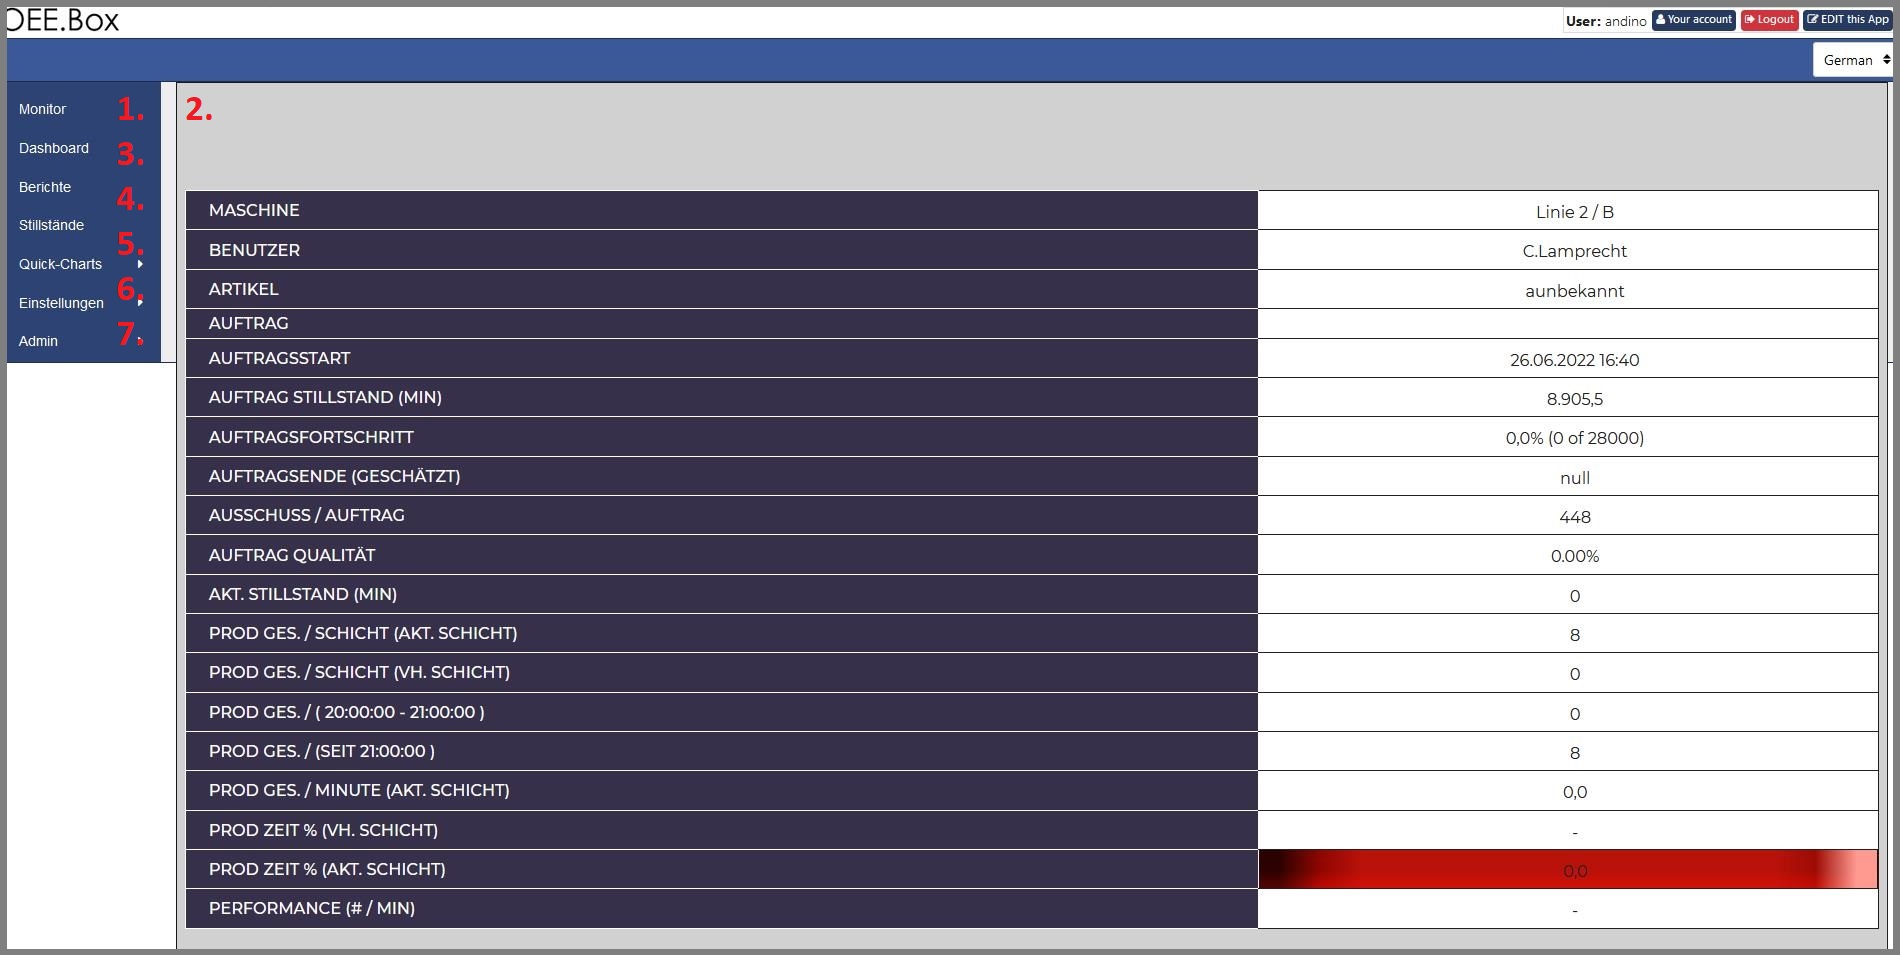
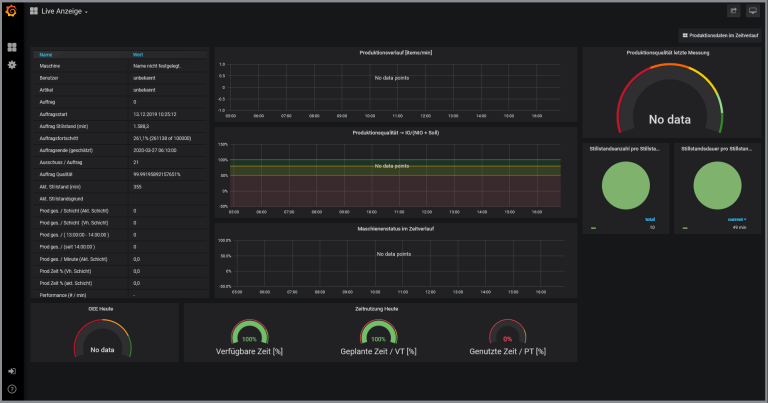
After you have logged in, you come to the home screen OEE.Box. This shows the live data monitor.
2. Live data monitor
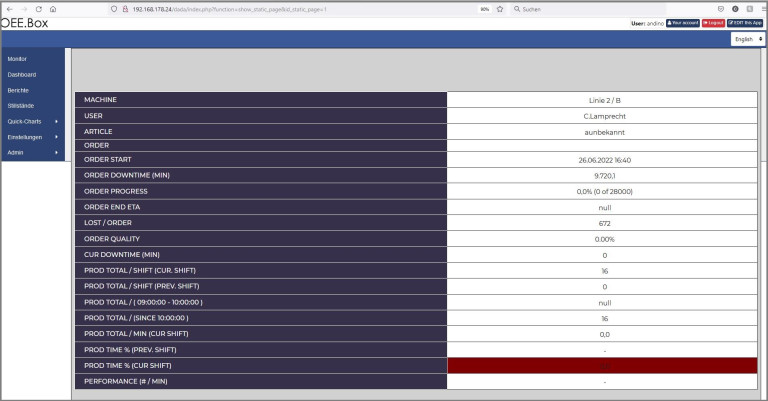
The [live data monitor](../live data) shows you the most important information about your production machine. That is why this screen is best suited as a hall monitor, as it gives every employee the opportunity to find out about the current status of production.
3. Dashboard
A very large amount of data accumulates in production and manufacturing. It is important not only to record and collect the data, but also to continuously evaluate and work with them. That's why we've developed a dashboard, which helps you to read out the production data that is important to you in real time.
4. Downtime
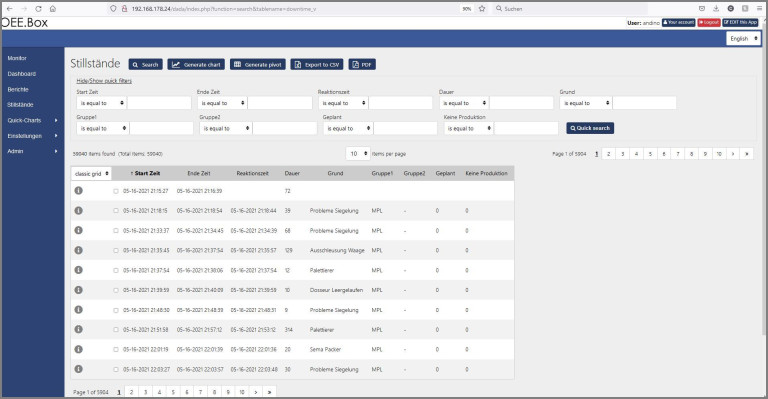
Here you will find a detailed list of the most recent downtimes.
6. Settings
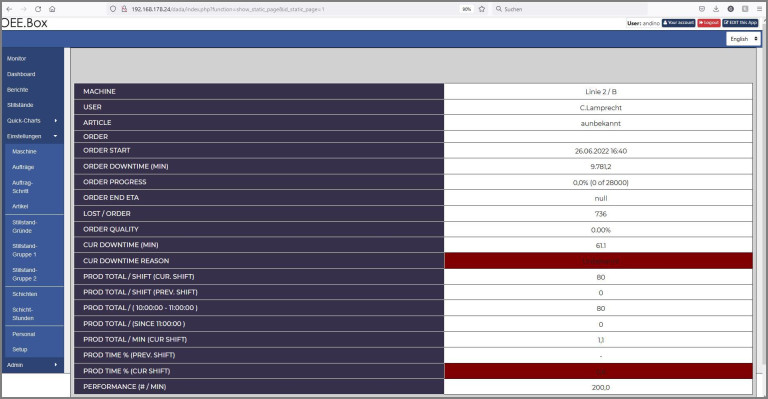
Here you can make settings for many different sub-areas for using the OEE.Box.
Detailed documentation on the individual items in the Settings category can be found further down on this page.
7.Admin
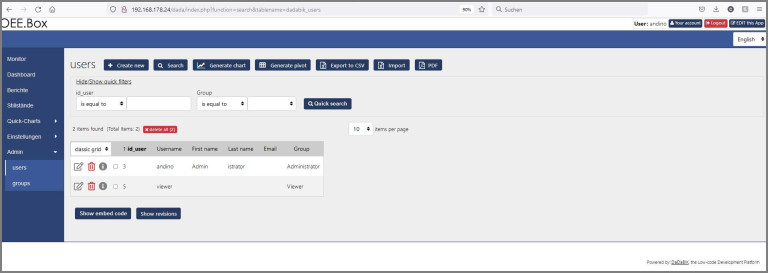
In the admin area you can create new users and assign them to groups.
Ideas
- Machine Basic machine settings such as name and configuration of the inputs are defined here.
- [Standstill reasons](#2-standstill reasons) Here you define the possible downtime reasons. Also whether they are planned, unplanned or no production time. You can use the report tool to print sheets with the corresponding barcodes.
- [Layers](#3 Layers) Here you define the possible shifts in your company. Early, late or night shift.
- [Shift hours](#4-shift hours) Here you assign the hours of the day to the shifts.
- Staff Here you specify the personnel who work on the machines or edit them.
- Orders Here you can create or edit orders. You can then use the reporting tool to print out order accompanying sheets.
- Order Step If the job is divided into work steps, you can specify them here.
1. Machine
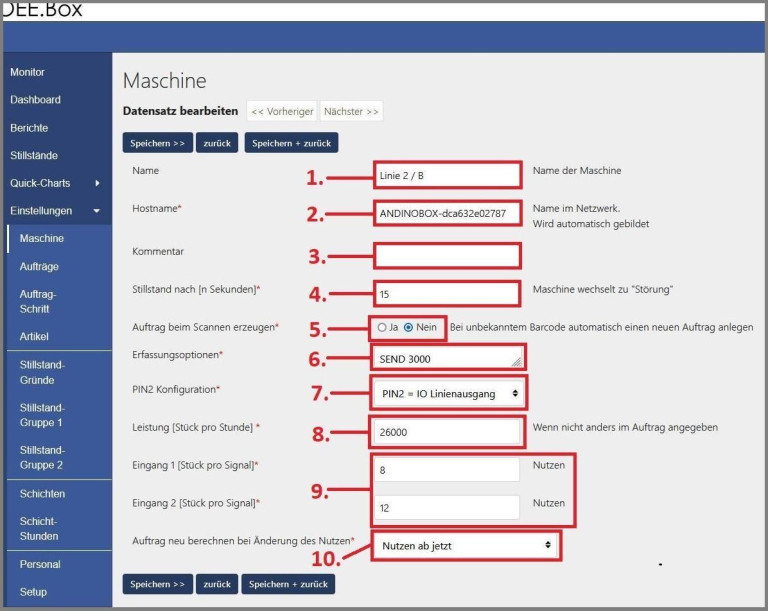
Under the Machine item, you can edit the basic settings for the machine.
- Name: In this field you can give your OEE.Box an additional name.
- Hostname: This is the name of the OEE.Box. You cannot change this as it is required to identify the machine. It consists of the OEE.Box and the MAC address.
- Comment: In this text field you can add additional information about the machine.
- Max.Downtime: This is the time in seconds after which a standstill is booked after the absence of cycles.
- Create job when scanning: Determine whether or not an automatic job should be created when scanning an unknown barcode. For further information, click here 1 = Yes 0 = no
- Acquisition Options: Configures the sampling of the input signals. For further information, click here
- Input configuration: Here you determine how the 2nd input signal is connected to your machine. (reject or exit). For further information, click here
- ITEMS PER HOUR: Here you set a guide value for how many pieces per hour your machine can ideally produce
- Input 1/2 pieces per signal: If a large number of parts are set during a production cycle of your machine, this can be entered here.
- Change of utility: If the use per cycle changes in the course of production, you can set here whether this should apply to the entire order or from now on.
2. Downtime reasons
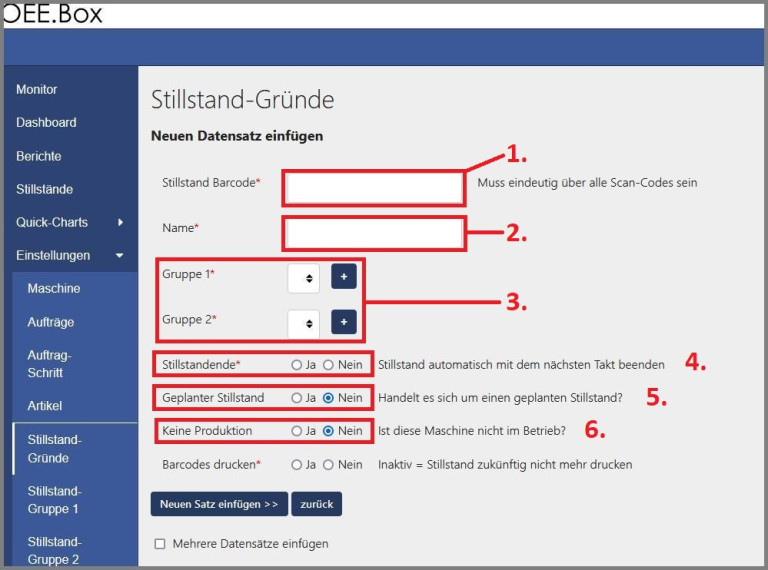
You can create individually created downtimes under Downtime reasons. To do this, click on "Reasons" under the "Settings" category. You will now see a list of all downtime reasons that have already been created. To edit a downtime reason you can click on the pen and paper icon and to create a new downtime reason you can click on the "Create new" button at the top left.
A window will now open in which you can define a downtime reason.
- Reason ID:
- Name: Here you can give the downtime reason a name
- Group 1 and 2: By dividing the downtimes into groups, more complex downtime reports can be generated. For further information, click here
- End of stillness: Determines whether the stillness should end automatically with the next bar. 1 = Yes / 0 = No
- Planned downtime: Specify here whether the downtime you are currently creating or editing should be created as a planned or unplanned downtime.
- No production: Defines whether the machine is in production or not.
3. Shifts
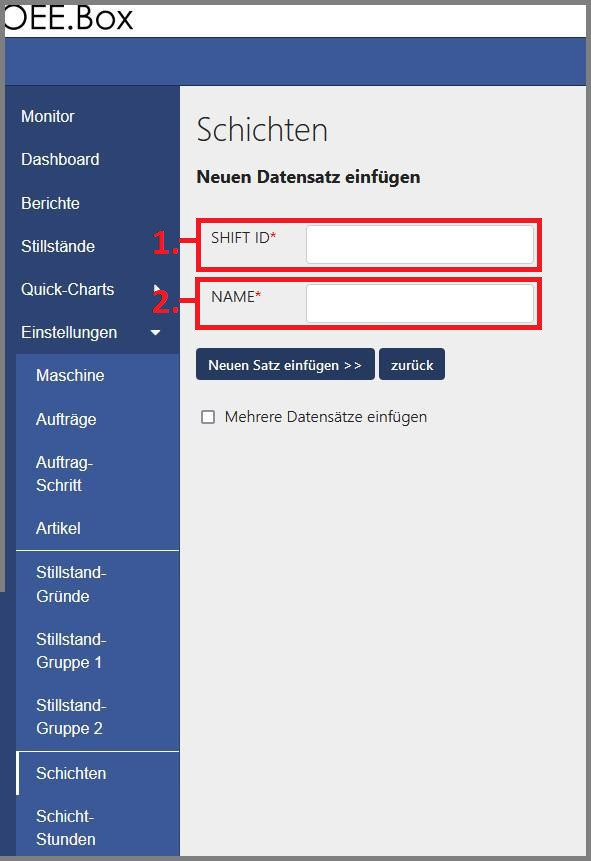
In addition to the standard shifts (early, late, night), you can create other shifts under the item Shifts. To do this, click on the "Shifts" item under the "Settings" category. To edit an existing order, click on the "pen and paper symbol". To create a new order, you can simply click on the Create new button again.
Now you can define a layer.
- Shift-ID: Here you assign an identification number (ID) to the shift.
- Name: Here you assign a name to the layer
4. Shift hours
You can then further subdivide the shifts that have already been created under the item shift hours. For example, you can divide the morning shift into different sections that can then be tackled by different staff.

5. Staff
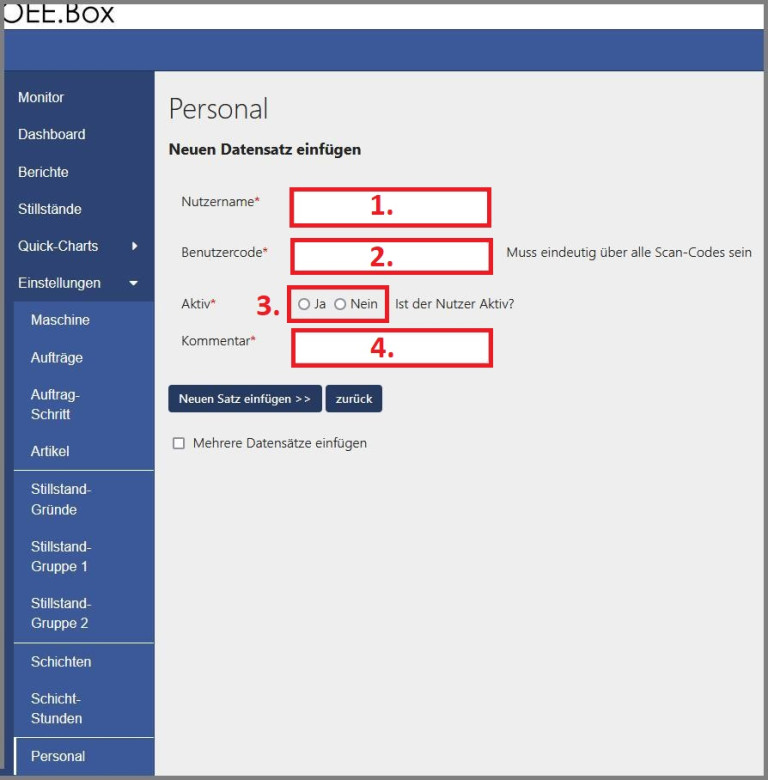
Under the Personnel item, you can create your personnel who work on the machine.
- Username: Enter a name or a pseudonym for an employee here.
- User code: Code with which the employee can identify himself by scanning.
- Active: The user's status can be set to Inactive if required.
- Comment: Enter information about the user
6. Orders
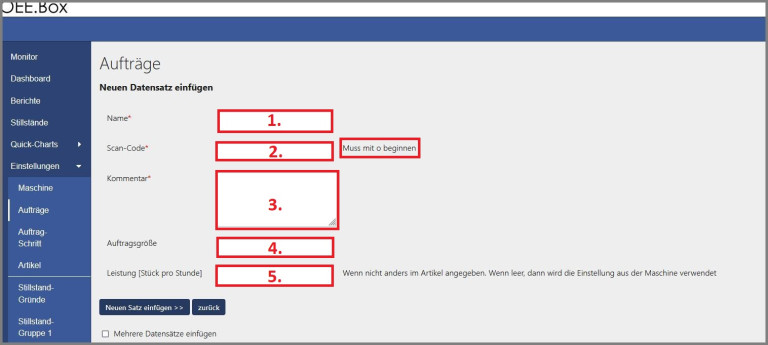
You can create your own orders under Orders. To create an order, you must fill out all mandatory fields.
- Name: Here you can give the order a name
- Scan code: Here you can assign a scan code to the order. Make sure, however, that the scan code starts with the letter "o" for order.
- Comment: in this field you can store additional information about the order.
- Order size: How many items should be produced in this order?
- Performance (items per hour): How many items should be produced per hour? If not specified, the default from the machine is used.
7. Order Step
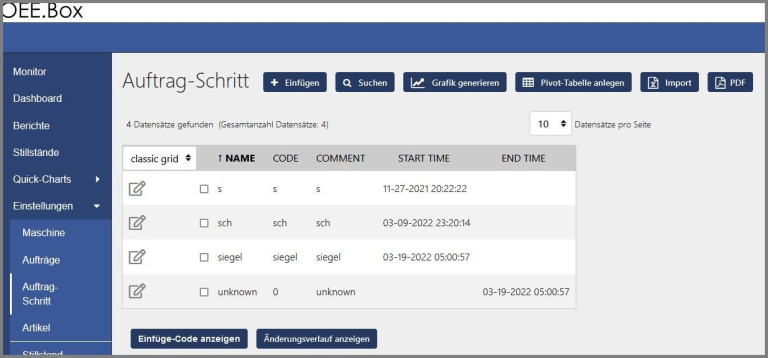
Under the Order Step item, you can subdivide the orders that have already been created into further smaller steps. To do this, click the Create new button again and then assign a name and a code.
Groups
By dividing the downtimes into groups, more complex downtime reports can be created. These groups can be freely assigned by you.

Let's take the two groups Type and Location for illustration.
- Group 1 therefore describes the type of downtime and the
- Group 2 the place of standstill. For example, the downtime "Glue missing" can be better categorized by assigning it a value for these two groups.
So in our example "Glue missing" would be Type: Maintenance and Location: Exit.
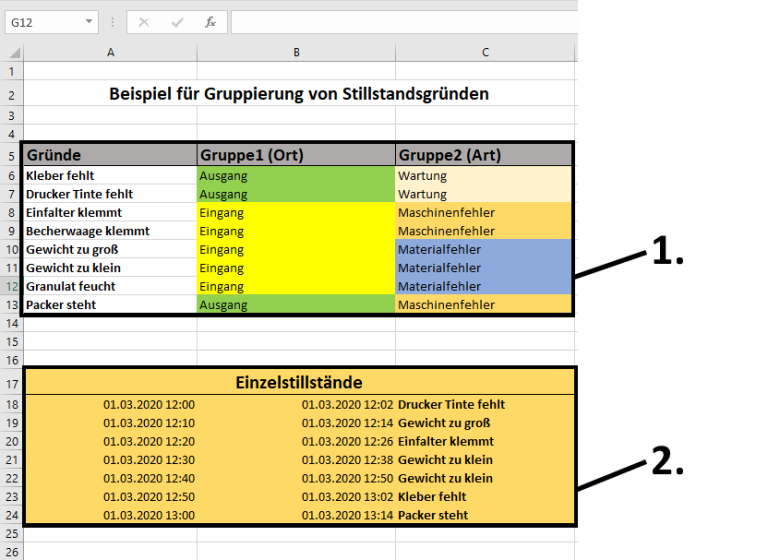
To illustrate this, we have created additional downtimes with this scheme and packed them into an Excel spreadsheet.
- Area 1 lists all downtime reasons for the last few days. Each standstill reason listed here received values for Group 1 (location) and Group 2 (type) when created in the OEE.Box.
- In Area 2 you can see the individual downtimes over time.
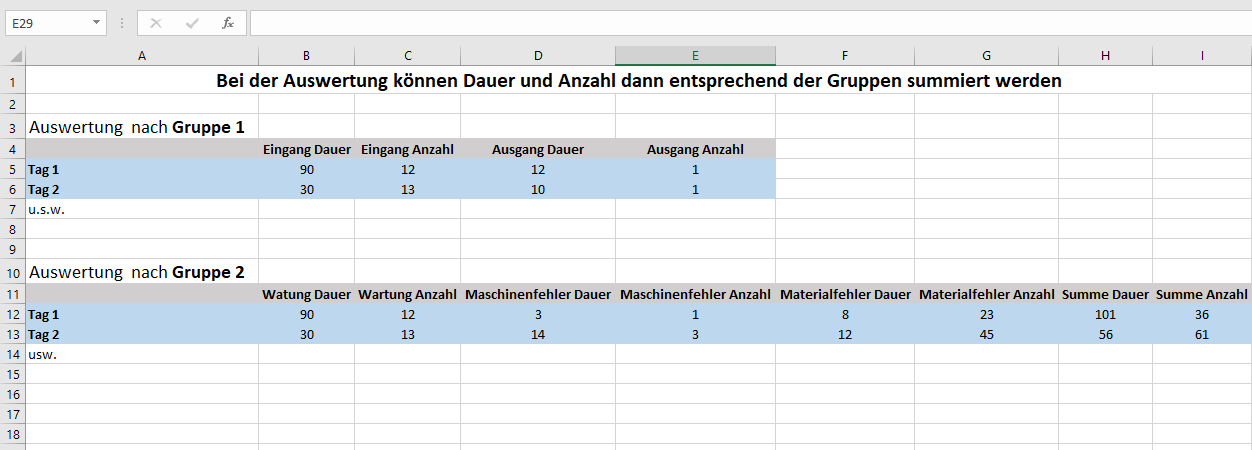
Now you can analyze these values by groups and thereby draw conclusions about the problem areas and the overall effectiveness of your production line.
Input Configuration
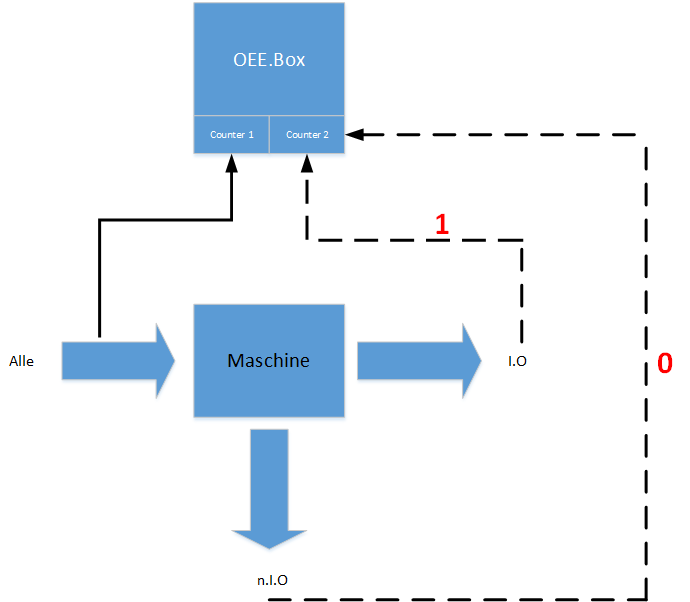
With the settings of the input configuration you can determine where the 2. Counter of your OEE.Box should count.
You have 2 options:
- 0 = The 2nd counter counts the lost (n.I.O items)
- 1 = The 2nd counter counts the output (I.O items)
Capture Options
- SEND 3000 = The states are updated every 3 seconds
- POLL 10 = The input is sampled every 10 milliseconds
- DEBO 3 = 3 equal samples and the level is accepted
- HARD 1 = Fixed
Generate job by scanning a barcode
With the Create order when scanning option, you can determine whether an unknown barcode should be interpreted and created as an order when it is scanned.
- 1 = When scanning an unknown barcode, a new job is created.
- 0 = When scanning an unknown barcode, no new job is created.
This option is particularly useful if you want to use barcodes that are already provided for orders in your company.
